Audi A5 Forum & Audi S5 Forum banner

DIY: AMI rerouting

72K views 23 replies 8 participants last post by  chewiiie  
#1 · (Edited)
As per my other thread I recently fitted a Brodit clip and the following is how I connected into the AMI, i figure the pictures may help someone.

I tried a number of cables and found this was the only which worked:

dockXtender: Dock Extender Cable for iPad, iPhone and iPod

There are a total of 6 screws which hold the glovebox in place, 2 at the bottom in the footwell, 3 in the inside lip of the glovebox and one at the end of the dash on the left. To get to the screw on the left pop off the end of end of the dashboard area you can see in the pic the holes where the clips are located:


There will be one screw which holds the top left of the glovebox.

There are a number of clips which hold it in place but I found it comes away pretty easily.


The easiest way I found to run the cable was through a hole in the top which only needed widened a little bit, if your fussy you could take the cable apart and reassemble the end once you pass it through


I cable tied the extension cable to the existing cabling to avoid rattling and ran it down through the bottom right vent into the footwell:


From here it was a simple case of running the cable under the trim and along a grove, I used some electrical tape to bulk the cable out and hold it in place:


I'm not entirely happy with having the cable exposed, there may be a way of routing it through the centre console and through the coin holder but for the moment it will suffice.

Hope the pictures help anyone thinking of something something similar.
 
#2 ·
I just purchased this cable from Amazon. If you happen to have "Prime" it will ship in 2 days for FREE

Amazon.com: CableJive dockXtender Premium Extension Cable for iPhone, iPod, iPad (6 foot black): Electronics

I may give the cable to my autobody guy and tell him to work his magic. I like screwing around with projects but there is no way in hell I'm going to take apart my car.

My goal is to have the cable come out in that little slot/pocket next to the cup holders and have it hooked into one of these retractable units so I can have slack and use the phone while still plugged in, but also have it retract back in when my phone is sitting in there or not plugged in.

Amazon.com: Retractable USB Hotsync + Charging Cable for Apple iPod / iPhone 3GS, Black: Electronics
 
#3 ·
Looks like there’s a few of us trying to achieve the same thing

I hate the fact that the AMI is in the glove box and not in the arm rest (as it is on the new A6!)
I have the cablejive dock extender cable (6ft long) and it works a treat – now just looking for a clean route from glovebox to armrest for a neat install.

Don’t really want to remove the glove box but seems like that the best way?
Also I want the cable to exit where the ‘non mmi ‘ aux in socket would be in the armrest
But again don’t want to start drilling holes in the centre console

Let me know how you get on?

Cheers
Keef
 
#6 ·
Heh that's something that didn't even occur to me!!!! Realistically all the airbag is in the upper section of the dash, the glovebox is just screwed in from underneath, disabling it wouldn't do any harm tho.
 
#7 ·
True, but IIRC the switch mechanism for the airbag is in the glove box, so at the very least probably better to turn it off first. Always cheaper than having to replace the airbag and fix the dash for the sake of a key turn.

Cheers
 
#9 ·
Well I finally plucked up the courage to remove the glove box this morning!
As described above by nino, I carefully extended the hole at the top of the glove box
(trying not to cut the airbag on/off switch wires) to route the dockxtender cable out.
As I purchased both the 2ft & 6ft cables, I‘ve connected them together and
have managed to the get the cable up and through into the arm rest (eventually - by removing the rear air vents and some luck)

So the cable now exits the where the ‘aux in’ is on non-AMI cars.
Which is where i wanted the cable as i keep my phone in the slot next to the cup holders.


I’m really pleased with the results, just need to find a square grommet to cut and go around the cable - any suggestions??

nino thanks for the guide :thumbsup:

Cheers
Keef
 
#10 ·
Well I finally plucked up the courage to remove the glove box this morning!
As described above by nino, I carefully extended the hole at the top of the glove box
(trying not to cut the airbag on/off switch wires) to route the dockxtender cable out.
As I purchased both the 2ft & 6ft cables, I‘ve connected them together and
have managed to the get the cable up and through into the arm rest (eventually - by removing the rear air vents and some luck)

So the cable now exits the where the ‘aux in’ is on non-AMI cars.
Which is where i wanted the cable as i keep my phone in the slot next to the cup holders.

I’m really pleased with the results, just need to find a square grommet to cut and go around the cable - any suggestions??

nino thanks for the guide :thumbsup:

Cheers
Keef
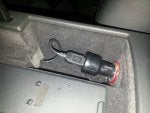
Looks nice. Do you think you could cut a hole from the arm rest compartment into the slot? You have to get around the cigarette lighter. If I paid someone to do this, what would be a good price?


I also purchased the dockXtender cable and it works great, but 50% of the time when I switch to AUX on my MMI, I get this warning <see picture> and have to unplug the Xtender from the cable in the glove box and plug it back in to have it reinitialize.
 

Attachments

#11 ·
Personally I wouldn’t want to cut a hole here as I want to keep the alterations to a minimum.
Also I like the flexibility of keeping the phone in the slot or arm rest compartment.
It doesn’t look too bad when the arm rest is down or slid slight forward.
I guess you could get this done professionally but I’d have no idea on price.

If you remove the rubber grip pad from the bottom slot there was a hole underneath but I don’t think
you’d get the cable through without further modification.

As for the cable I haven’t had any problems (yet) - haven’t had the error message you get – so sorry I can’t help.

Cheers
Keef
 
#12 ·
Do you think I could do the same as you with just the 6ft cable?
 
#13 ·
Don't think so - wasn't long enough based on the route I used over and down the back of the glovebox.
Also it was much easier to feed the short cable down from the arm rest and then connect the 2 cables by the seat and then tuck the under the trim.
Also easier to get back to if need be in the future!
 
#14 ·
Glove box grommet

Keef, it's been awhile since your post, so, insuspect you may have solved your "square" grommet problem by now. You seems like the type of person who would have figured this out soon & I am probably telling you some things you already know. Regardless, here's a late suggestion.

Just find a suitable large round grommet, cut it once, then press it on on side of your square opening and work your way around and cut to length. It should stay in place. It probably would not completely fill the air, but, it would cover the sharp edges and look good.

These grommets are available from hardware stores, home centers, maybe Radio Shack or Frys Electronics. You could also get some small SOLID rubber tubing about a 1/4" in diameter and fashion some edging by slicing along the rubber. Probably a lot of work though.
 
#17 · (Edited)
Just routed the cable through the console, I've posed some instructions on getting into the console in my service manual thread.

In terms of a grommet I took the existing square blanking piece and cut out a semi circle to allow the cable through.
 

Attachments

#24 ·
Nino---

Thanks for the how-to. Installed mine today. Routed the cable up through ashtray :) View attachment 18081
Hi DML,

Could you tell me how did you route the cable from the glovebox to the ashtray ? I know I can use the small hole in the top-back of the glovebox (I already did it for a USB cable to get power from the fusebox), but how do you end in the ashtray ?
Thanks !
 
#22 ·
On the blanking insert you will see 3 of the sides will have little clips which hold it in place, attack the side with no clips :)